Create New Groups
Administrators have the ability to create groups, assign users to a group, grant permissions to a group, and assign groups to cases. These procedures can be completed in the System Manager.
|

|
Note: Users are not assigned permissions directly. Rather, permissions are set at the group level and filter down to the users assigned to them. Similarly, users cannot be assigned to cases directly. They must first be assigned to groups, and those groups assigned to cases.
|
These procedures assume users were already created as explained in Create New User.
Complete the following steps to create a new group and add users:
- Click the Settings icon
 in the top-right corner of the screen. The Settings icon is a global button that displays in every module of the OPEN DISCOVERY platform.
-
The System Manager opens. In the left pane of the System Manager, click Groups.
-
You have the option to create a new group from scratch, from an existing group or from a security template. Expand the options below for details on each workflow.
To create a new group from scratch:
-
Click the  button at the top of the screen. The Create New Group page opens.
-
Enter a name for the new group. When finished, click Continue to proceed to the next step.
-
On the Assign Users step, select the users you would like to assign to the new group. Selected users are highlighted in blue. To assign all users to the group, click Select All in the top-right corner of the box. To search for individual users, type the name in the search bar. When all needed users have been selected, click Continue.
-
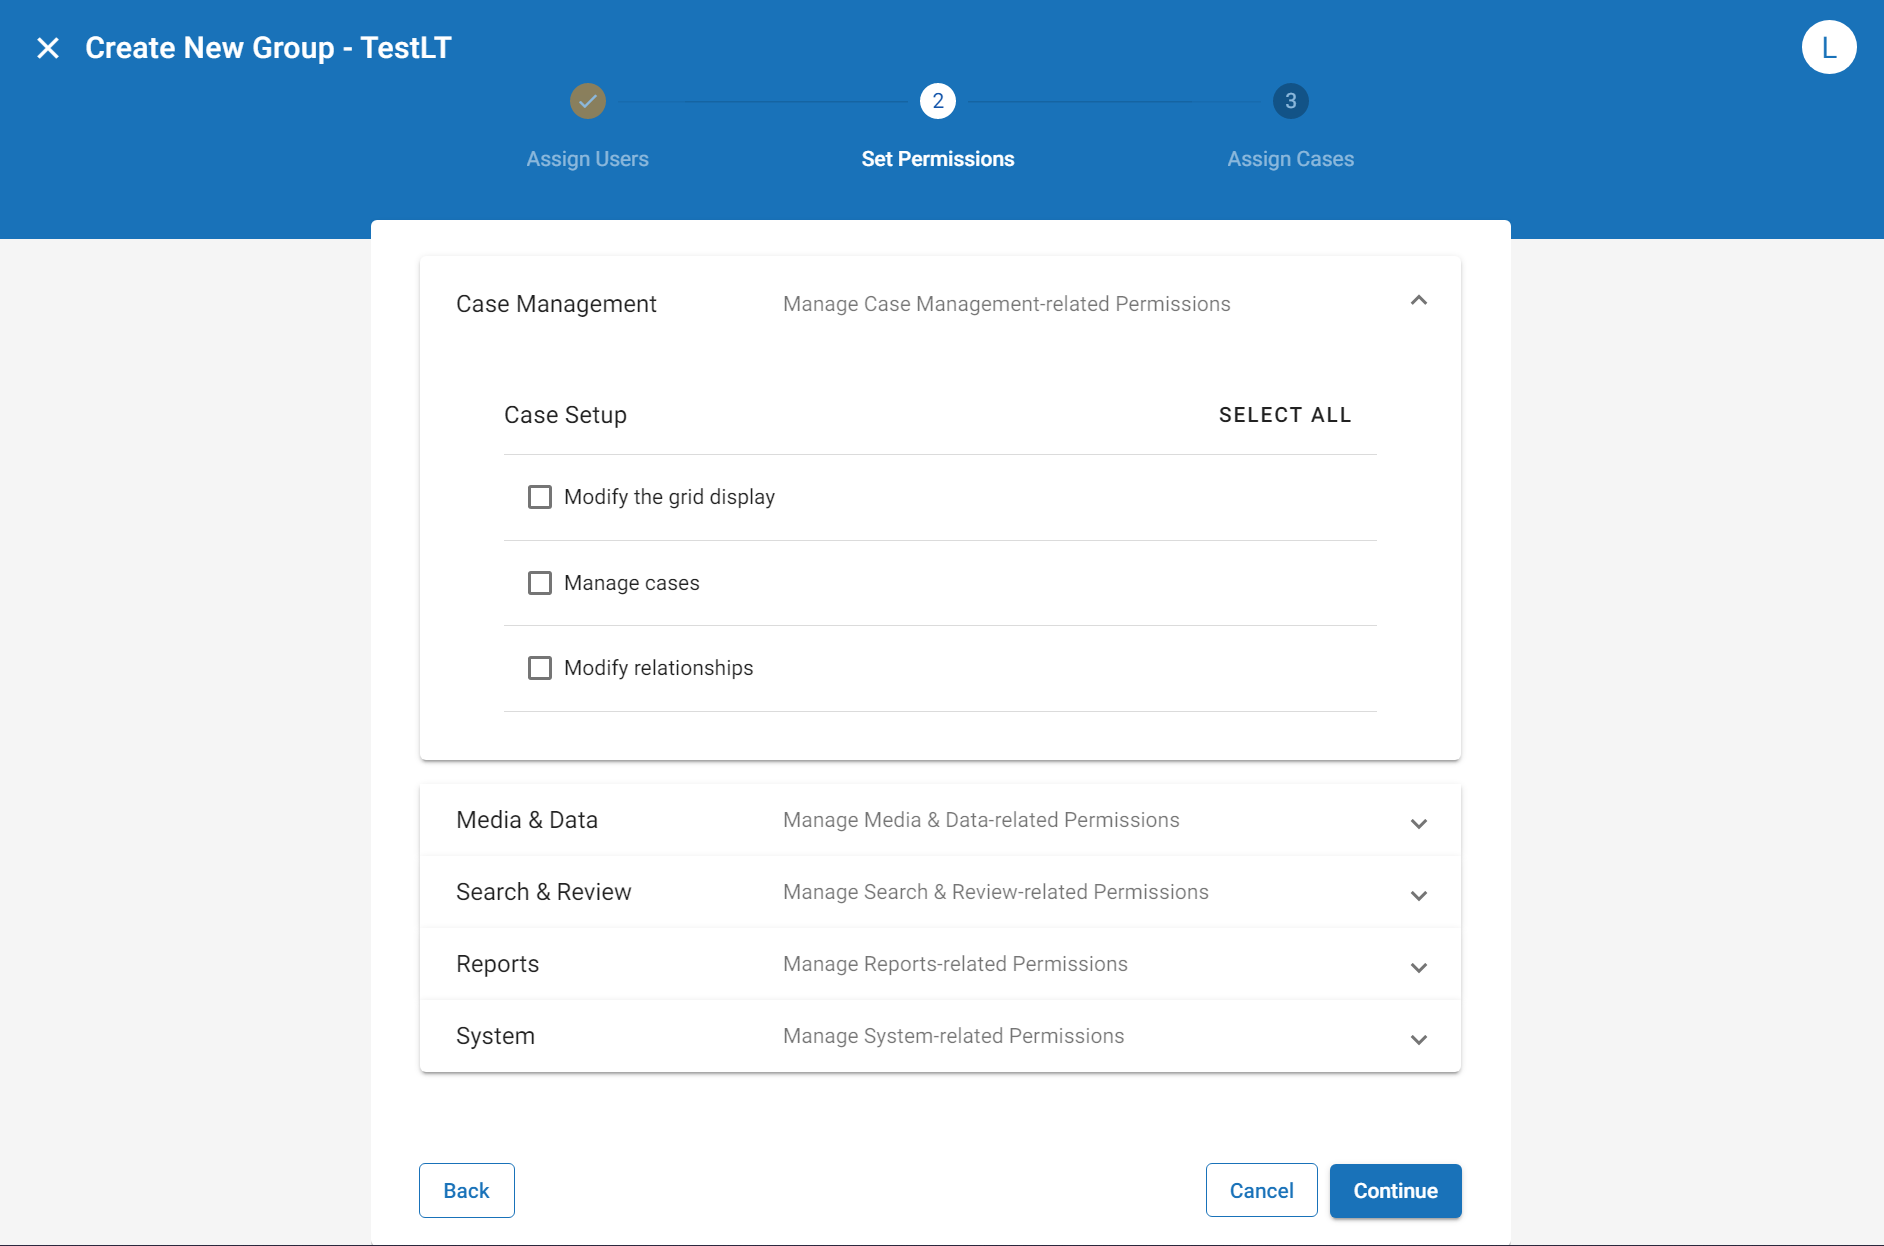
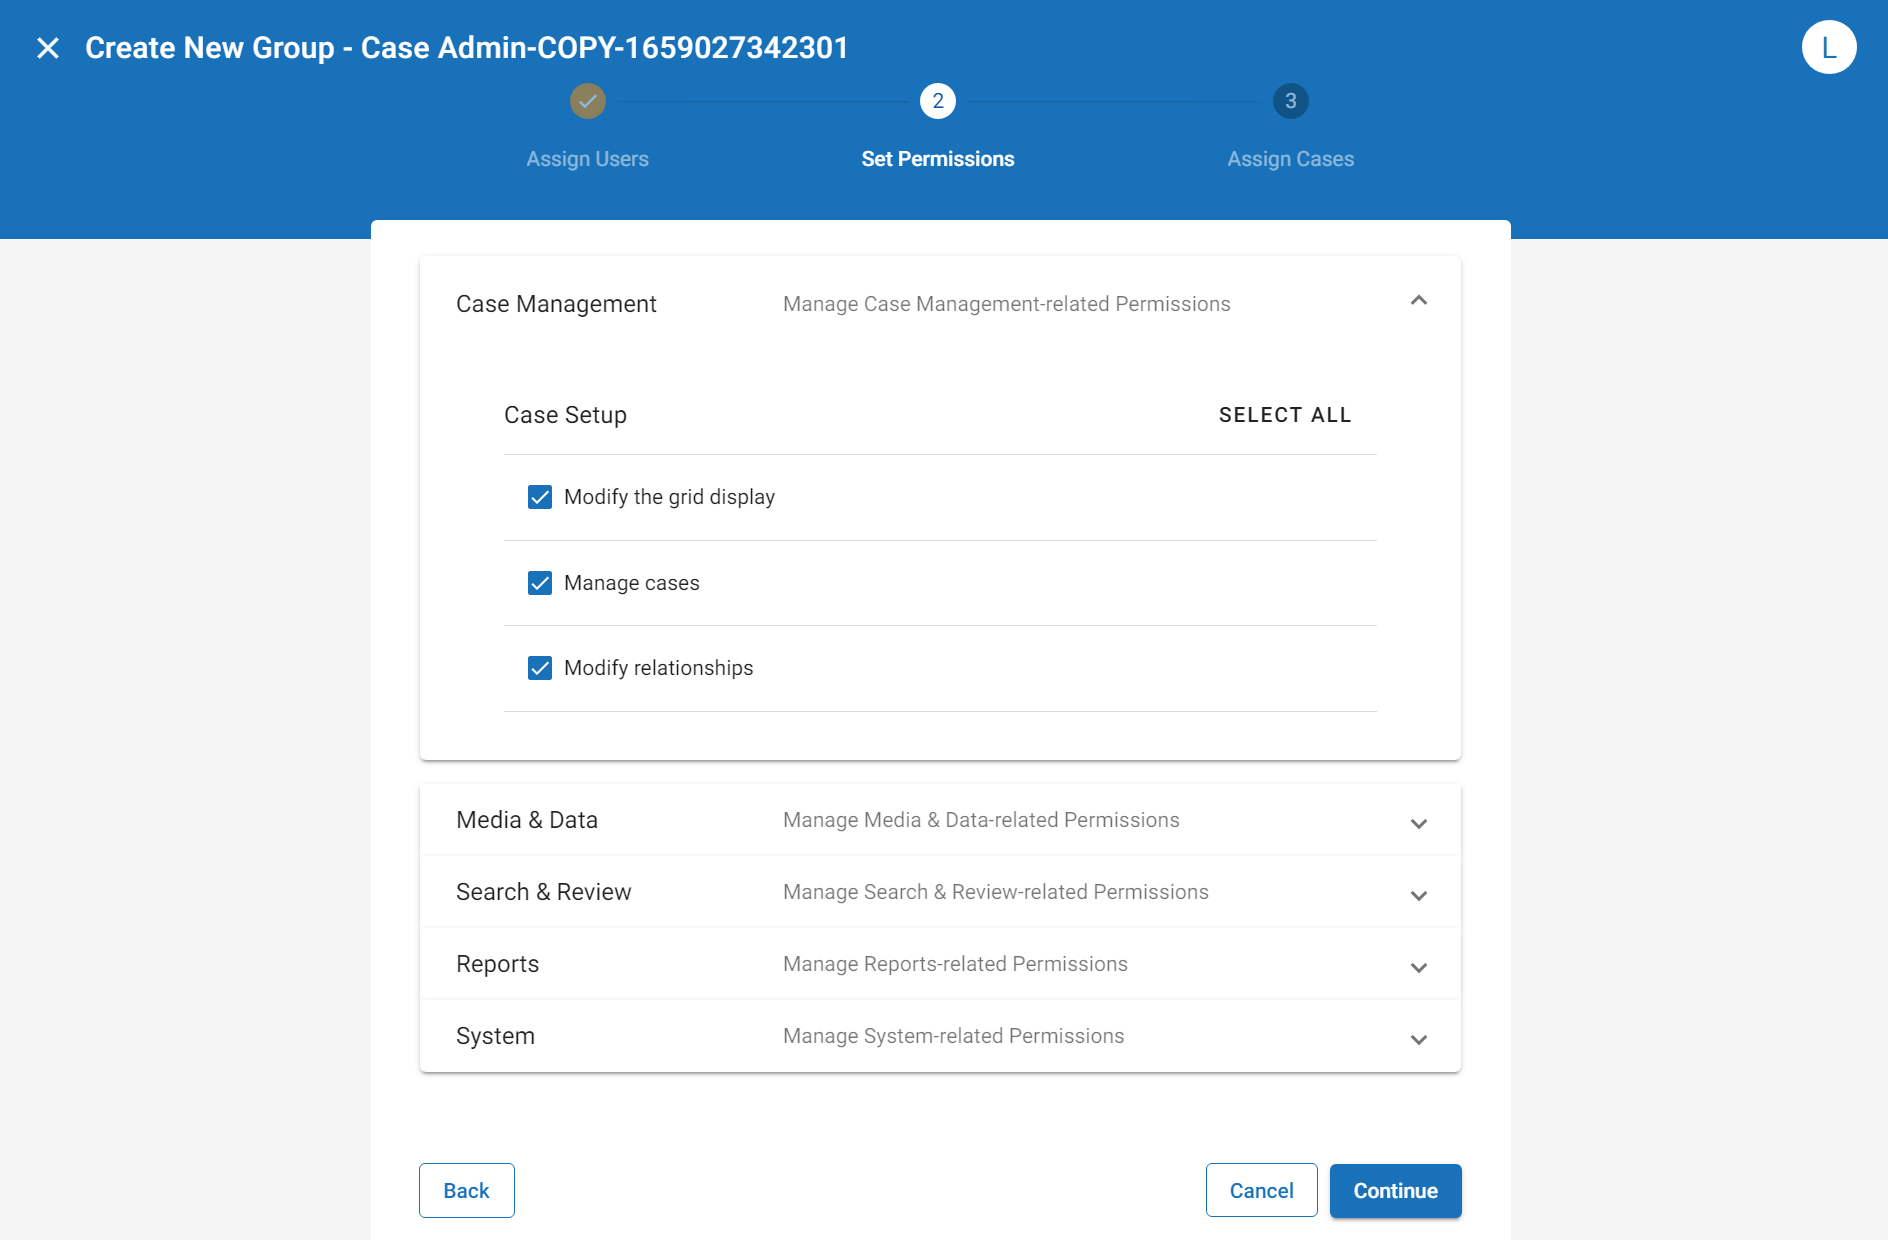
When you create a group from scratch, you must assign all permissions manually. On the Set Permissions step, expand the needed section (Case Management, Media and Data, Search and Review, Reports, or System), then click the check box beside each permission you would like to provide the group. You can select all permissions in a given section by clicking Select All at the top right corner of the section. You can clear all permissions in a given section by clicking Select All again. In certain places, permissions can be selected from a drop-down menu. To learn more about the list of available permissions, see Permissions List. When finished assigning all permissions, click Continue.
-
On the Assign Cases step, select the cases that you would like to make accessible to the new group. Selected cases are highlighted in blue. To assign the group to all cases, click Select All in the top-right corner of the box. To search for specific cases, type the name of the case in the search bar. When all needed cases have been selected, click Save.
To create a new group from an existing group:
-
Click the button at the top of the screen and select Create New Group from Existing Group. The Select Group Template page opens.
-
Click the Group Name dropdown, then select the appropriate group from the list and click Continue.
-
On the Assign Users step, select the users you would like to assign to the new group. Selected users are highlighted in blue. To assign all users to the group, click Select All in the top-right corner of the box. To search for individual users, type the name in the search bar. When all needed users have been selected, click Continue.
-
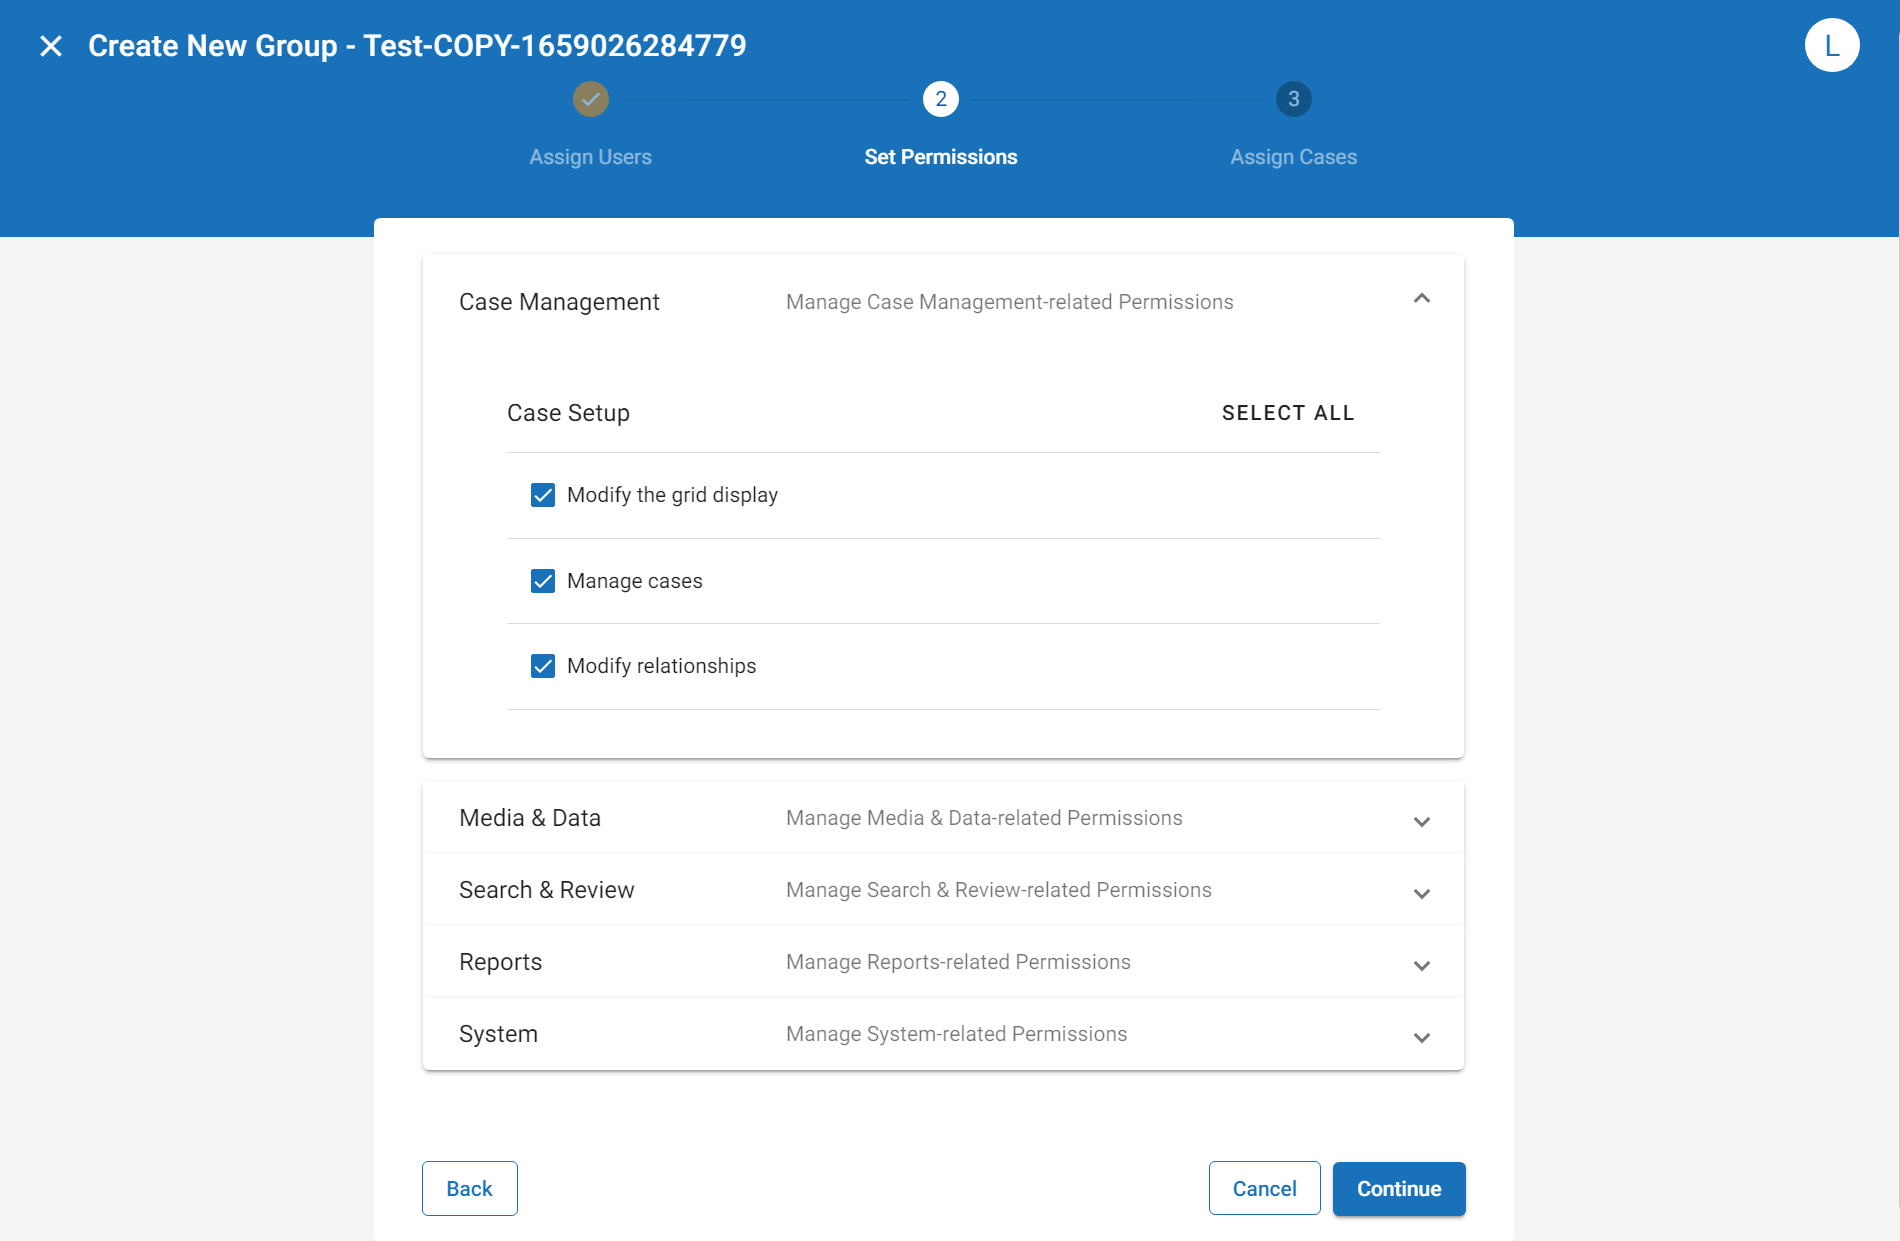
When you create a new group from an existing group, you use the permission set of an existing group as a template for the group you're adding. All permissions assigned to the existing group will be applied to the new group. You can then tweak the permissions as needed to suit the new group. On the Set Permissions step, the permission set will update automatically to reflect the configuration of the chosen group. You can then tweak the permissions manually to suit the new group. Expand the needed sections (Case Management, Media and Data, Search and Review, Reports, or System), then click the check box beside each permission you would like to provide the group. You can also remove a permission from the group by clicking on a check box that has already been selected. When finished assigning all permissions, click Continue.
-
On the Assign Cases step, select the cases that you would like to make accessible to the new group. Selected cases are highlighted in blue. To assign the group to all cases, click Select All in the top-right corner of the box. To search for specific cases, type the name of the case in the search bar. When all needed cases have been selected, click Save.
To create a new group from a security template:
-
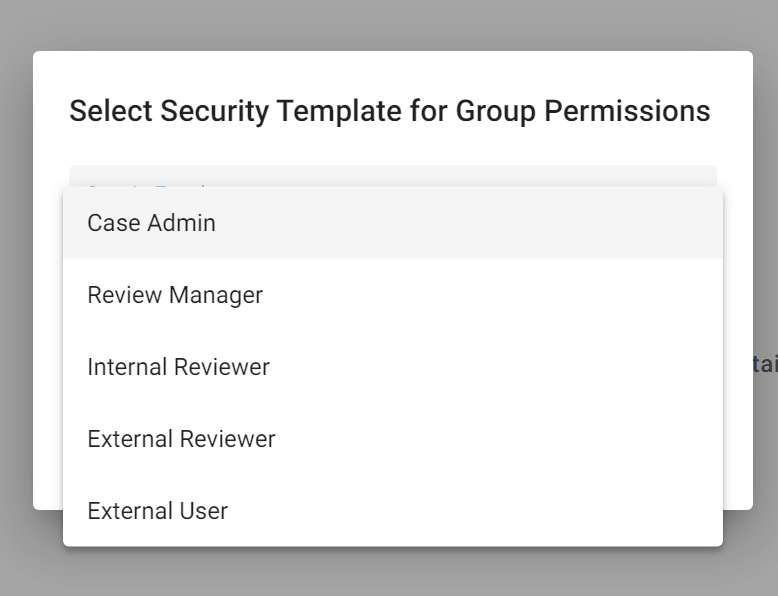
Click the button at the top of the screen and select Create New Group from Security Template. The Select Security Templatefor Group Permissions page opens.
-
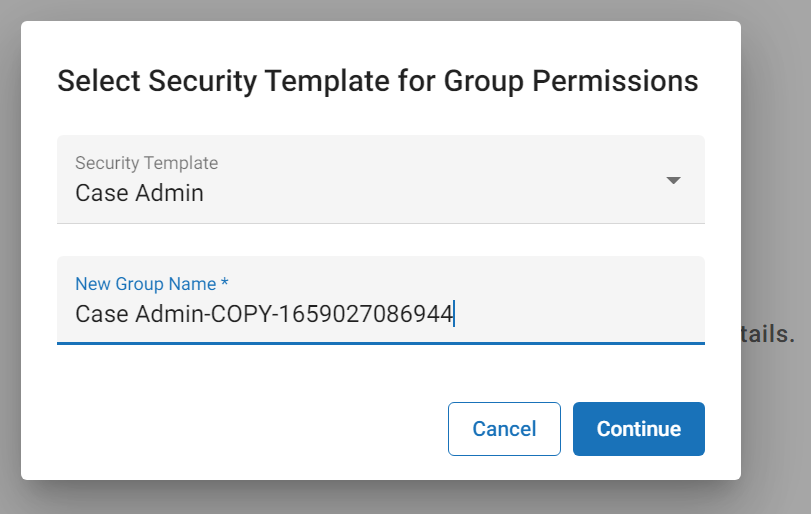
Choose the appropriate option from the Security Template dropdown. These templates, which must be created ahead of time, come with permissions already configured. For more information on security templates, see Overview: Security Templates.
-
The New Group Name field will auto-populate based on the selected template. You can choose to edit the name or rename the new group. When finished, click Continue to proceed to the next step.
-
On the Assign Users step, select the users you would like to assign to the new group. Selected users are highlighted in blue. To assign all users to the group, click Select All in the top-right corner of the box. To search for individual users, type the name in the search bar. When all needed users have been selected, click Continue.
-
When you create a new group from a security template, you choose a pre-existing security template with group permissions already configured. On the Set Permissions step, the permission set will update automatically to reflect the configuration of the chosen security template. You can then tweak the permissions manually to suit the new group. Expand the needed sections (Case Management, Media and Data, Search and Review, Reports, or System), then click the check box beside each permission you would like to provide the group. You can also remove a permission from the group by clicking on a check box that has already been selected. When finished assigning all permissions, click Continue.
-
On the Assign Cases step, select the cases that you would like to make accessible to the new group. Selected cases are highlighted in blue. To assign the group to all cases, click Select All in the top-right corner of the box. To search for specific cases, type the name of the case in the search bar. When all needed cases have been selected, click Save.
Related Topics
Create New User
Manage Users and Groups
Edit a Group
Delete a Group


 Create A New Group From Scratch